Friday, August 31, 2012

Don't Know Where To Start? - Try This


Some days I have so many things on my to-do list that I just don't know where to start.  Sometimes this is how my day goes:

I start to unload the dishwasher and part way through decide that I should vacuum the living room first.  I get out the vacuum cleaner and get it all set up when I notice that the furniture is dusty.  One should always dust before they vacuum so I leave the vacuum cleaner and grab the dusting spray and a cloth.  I realize that I should do a load of laundry first.  I set down the cloth and spray, leave the living room and head to the laundry room.  While there I see the freezer and decide that I should take something out to defrost for dinner.  I grab the meat from the freezer and leave the laundry while I take the meat to the kitchen.  I then notice that I still have not unloaded the dishwasher!  In fact, all I've managed to do is take the meat out of the freezer for dinner!

It's at this point that I realize that I need to focus on one thing at a time because flitting around like a bee pollinating flowers is not getting anything accomplished.  This is what I do to stay on track and get things done.

First write the numbers 1-6 on pieces of paper.


Fold them in half and put them in a small bowl or cup - I use an old tea cup.

Next write out a to-do list.  Each task can only take 15 minutes.  If your task will take longer than 15 minutes then divide it into smaller, 15 minute increments.  Number the tasks 1-6.  Most times you will have more than 6 things on your list. Break the list in two parts both numbered 1-6. List the most important items on the top list and the least important items on the bottom.


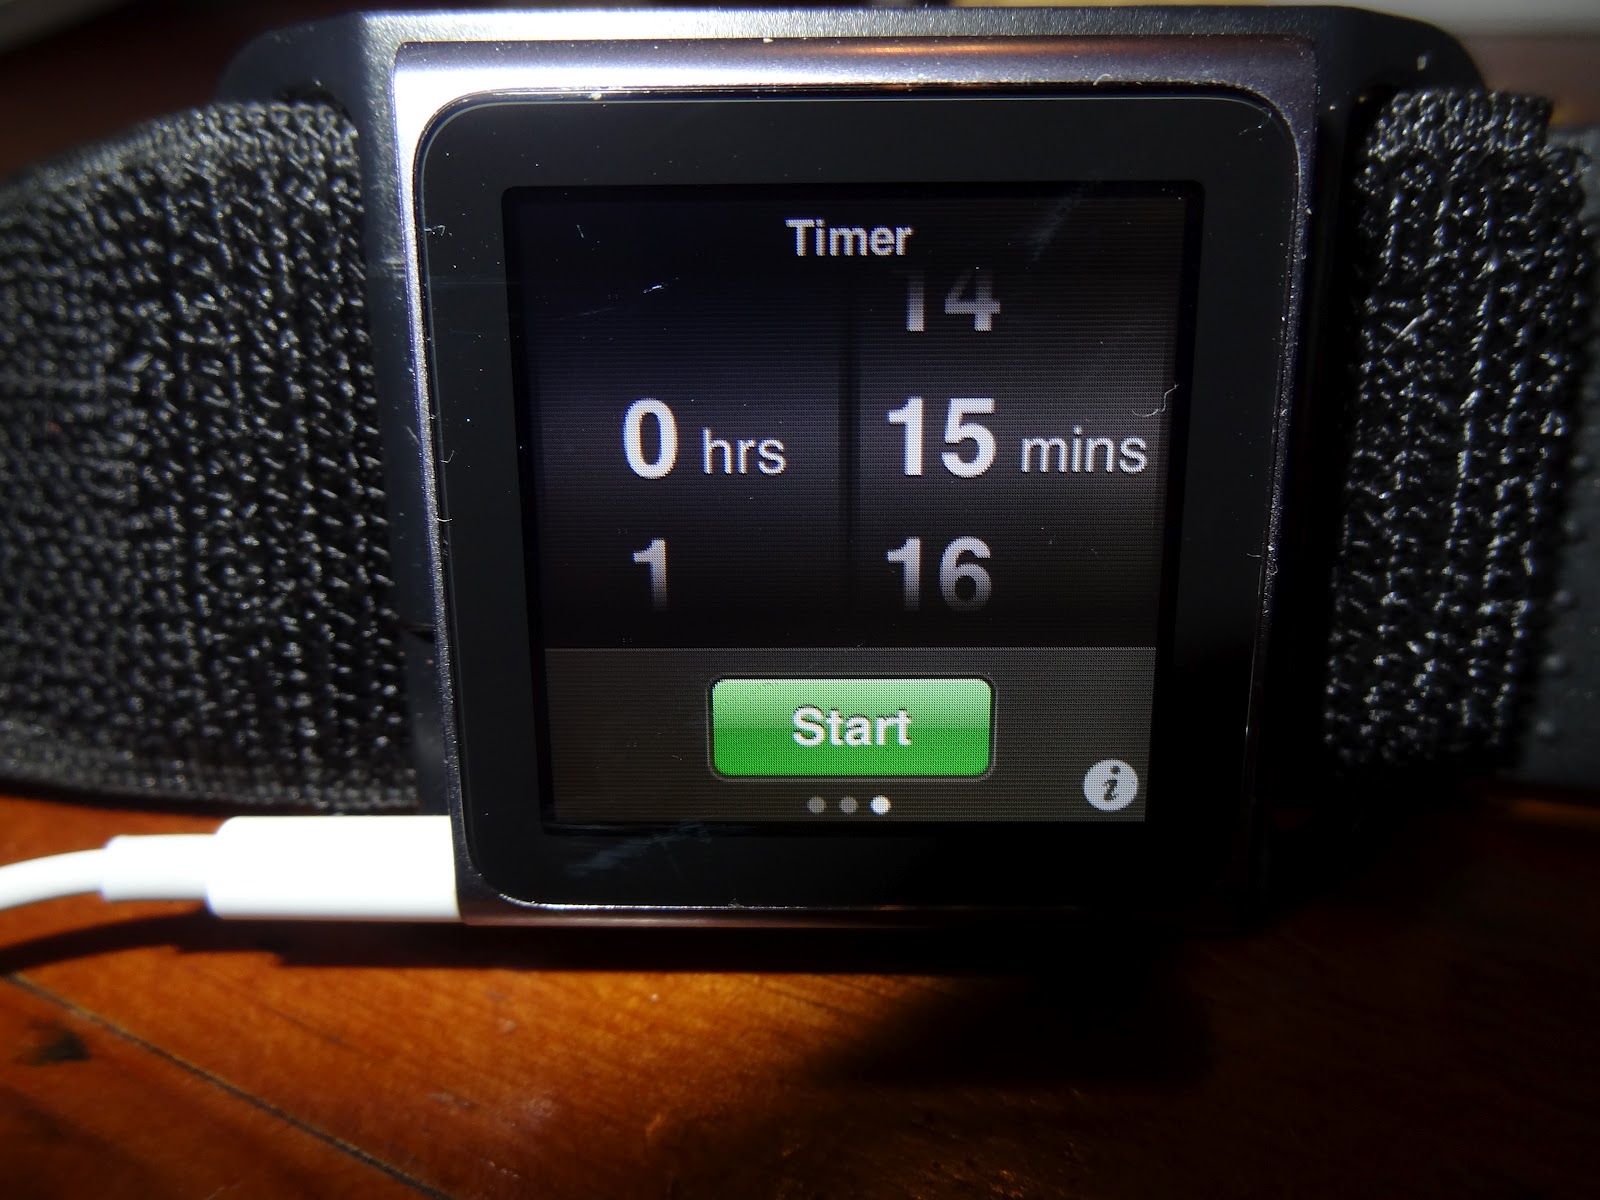
Set a timer for 15 minutes - I use my iPod but you can use your oven timer or any other timer that you have.


Pick a number from the bowl and do the corresponding number on your to-do list.  Don't worry if the list has you vacuuming before dusting, the important part is to stay focused on one task for 15 minutes.  Once the 15 minutes are up, re-set your timer and draw another number.  After the third session set your timer for 15 minutes and do something for you.  Get a drink of water, sit and relax.  Check your Facebook or read a magazine article.  When the timer goes off then it's time to start again.

You'll be surprised at how much you can get done in 15 minutes of focused time.  When I first started doing this one of my tasks was to dust the back staircase.  It turns out that I can dust the back staircase and the basement stairs and wash them both by hand in 15 minutes.  This will also make you better at estimating the amount of time that it takes you to do certain tasks.  Some people think that it will take 20 minutes to unload the dishwasher when in reality it can be done in about 3.

This doesn't just work for household chores.  Try it at work too.  Spend 15 minutes filing, then 15 minutes answering emails and so on.  It's easier to stay focused for short periods of time and you will be much more productive.

Do you have any tips for staying focused on the task at hand?

Wednesday, August 29, 2012

Skinless, Boneless Chicken "Wings" Recipe


Like many of you, I have been trying to get my family to eat healthier.  It can be hard because they don't want to give up all of their favourites like pizza, burgers and chicken wings.  I have come up with a healthier recipe for chicken "wings" that my family enjoys more than the regular kind.  In fact, when I made these the other night Mr. P declared that he loves eating food he doesn't have to work for!

This is my recipe for skinless, boneless chicken "wings".

Ingredients

skinless, boneless chicken thighs (each thigh makes 2 "wings" so use as many as you need - I serve 6 "wings" per person)
salt and pepper to taste
sauce - your choice of wing sauce - hot, medium, mild or, our favourite, honey garlic (recipe below)

Cut chicken thighs in half.


Shape each half into a rough chicken wing shape and place on a cookie sheet.


Keep going until all of your thighs are cut and shaped and then salt and pepper to taste.


Place in a 350 oven for 20 minutes.  At this point you can start your sauce if you are making it from scratch.  Here is my recipe for a delicious Honey Garlic sauce.

Honey Garlic Sauce
 

Ingredients

3 tbsp. honey
2 tbsp. hoisen sauce (can be found in the Asian section of your grocery store)
1 tbsp. soy sauce
1 tsp. freshly grated ginger root
1 large clove of garlic, minced
few drops of sesame oil
1/4 tsp. curry powder
1/4 tsp. coriander

In a small bowl, combine honey, hoisen sauce and soy sauce.


I use a small grater to grate in the garlic and ginger.


Add all the other ingredients and whisk together.


Set aside for later.

After 20 minutes take the "wings" out of the oven.


At this point they are completely cooked and you can toss them in a bowl with any bottled sauce that you would like but I like to go an extra step.  I now put the "wings" on the grill to give them more flavour and to caramelize the sauce.


Baste "wings" with the sauce until there are some nice grill marks and the sauce has caramelized.


Serve with some ranch dressing, celery and carrot sticks and you will have a healthy meal that your family will enjoy. 


Give them a try and tell me what you think!


Monday, August 27, 2012

Better Late Than Never But Never Late Is Better


Are you habitually late?  Being late, even just once (when it counts), can make people believe that you are incompetent, self-centered and lack integrity.  More importantly, though, being late is really stressful!  We panic and forget things that we need to take with us (like a small child).  We snap at our loved ones and, of course, as soon as we are running late, we get behind someone on the road going slower than an asthmatic snail that causes our stress levels to skyrocket. 

When my boys were little my dear, sweet mother-in-law would quite often babysit for us.  However, dear, sweet mother-in-law was also chronically late.  We learned to tell her that we needed her 15 minutes before we actually did so that Mr. P and I would not be late to functions.  However, as my boys got older, my mother-in-law decided to re-enter the work force after being home for several years.  Because her job required her to meet with clients several times a week, she had to institute some strategies to help her get to these meetings on time.  The point of all of this, besides being a plug for my dear, sweet mother-in-law, is that it is possible to learn how to be on time.

Here are a few tips that you can try to help you be punctual.

1. When you need to be somewhere on time, write down your appointment 15 minutes earlier than when you really need to be there (it worked with my dear, sweet mother-in-law).  If you need to be at the dentist at 1:00pm then write it on your calendar as 12:45pm.

2. Set up some sort of reminder.  Online calendars like Cozi will text a reminder to you in advance but even just a post-it note paper clipped to your purse strap will help you remember those "can't forget" appointments.

3. Adjust the amount of time that you give yourself for your commute to account for rush hour traffic.  If you think that it will take you 30 minutes to get to your destination than give yourself 40.  Try to add at least 25% to the time you have allotted.  For me, living in a relatively small town, rush hour is when I have to wait for more than 4 cars before turning left.  More than 8 and I wonder if I should pull over for the funeral procession.

4. If you can, avoid scheduling appointments during "peak times".  A trip to a doctor's appointment at 9:00am means rush hour traffic.  If you can make it for 10:00am instead you could save valuable commuting time.  However, don't make your appointment too late because we all know that a doctor's appointment at 3:00pm usually means a good hour wait in the waiting room!

5. Don't check your email or your voicemail just before leaving.  It always takes more time than you think.

6. Be sure to fill your car's gas tank at least once a week or when it hits 1/4 full.  Never be late because you had to stop for gas.  You just can't estimate how many people will be in front of you in the line up for gas and how long they will take.  I fill my car up every Friday while I am running errands and getting groceries.

7. Streamline your morning routine.  Lay out your clothes the night before and have everything ready that you need to take with you in the morning set in one spot.  For more information on how to streamline your morning routine click here.

8.  Set your clocks ahead by a few minutes each - by different amounts.  Since you probably won't remember just how many minutes each clock is set ahead you will have to take each one at face value.  For your computer, try using the Procrastinator's Clock.  This awesome download will set your computer's clock up to 15 minutes ahead.  The trick is that it is not always 15 minutes ahead, sometimes it can be only 2 minutes or maybe 5 minutes.  It gives you a sense of urgency because, "you have to assume that the clock might actually be telling the correct time though it’s likely to actually be up to 15 minutes fast. Yikes! All that anxiety should give you a good kick in the pants to get moving, because you can’t really trust the clock to be anything but on time, even though it probably is fast."

9. Figure out what's important and prioritize. Sometimes you just don't have enough hours in the day to do all that you want to do and trying to cram in more will not give you the life that you want to live.  Lead a life of quality, not quantity.


Friday, August 24, 2012

Streamline Your Morning Routine


Have you seen the 1983 classic A Christmas Story?  It is one of my favourite movies of all time.  One of the reasons is because of the scene above.  Mom, at the stove preparing bacon, eggs, toast, oatmeal, coffee, juice and milk for her family before they head off for work and school.  I always dreamed of having a morning like that.  I can tell you right now, it never happened.  Ever.  OK, maybe on the weekend when there was that rare day that we did not have an early morning hockey practice or Mr. P did not have to run out for some plumbing emergency but this scene has never happened during the weekday when school was in.

It's almost time for the kids to go back to school and this will be the first time in 17 years that I don't have a child heading back.  I have to admit that Mr. P and I are doing a happy dance over that!  No shopping for school clothes, books, pencils, pencil crayons, back packs, lunch pails, and well, you get the picture.  And yet, I will miss those days dearly and I have a twinge of regret that I was never able to send them off like the mom in A Christmas Story.  Sometimes we set such high standards for ourselves, don't we?


This is a picture of my boys waiting for the school bus on one of their first days of school.


This is my youngest on his first day of school ever.  Excuse me while I wipe a tear!  How cute they were!

Alright, enough reminiscing and back to the topic at hand, which is, how to streamline your morning routine to get you out the door faster and with less stress.

Your morning routine actually starts the night before.  Try doing these following tasks the night before to make your morning run more smoothly:

1. Lay out your clothes for tomorrow including sock, undies, shoes and accessories.  Have everyone else do the same.

2. Program your coffee maker to come on before you roll out of bed.  There's nothing more enticing than the smell of fresh brewed coffee to make getting out of bed easier.

3. Program your thermostat so that the heat kicks on 30 minutes before you have to get out of bed.  Getting out of a nice warm bed when the room is still cold requires more willpower than saying no to dessert after 3 months on a diet!

4. Prepare your lunch or as much of it as you can.  If you don't like making your sandwich the night before because it gets soggy by lunch the next day, then place all the supplies that you will need to make it in the morning together in the fridge so that you can access it easily and know if you are out of something.

5. Check your calendar for the next day and prepare your to-do list.  This will get your mind wrapped around how you need to plan for your day to go smoothly.

6. Make sure you have enough gas in the tank of your car.  If not, fill it up after dinner instead of in the morning.

7.  Have one place where you put all the items that you need to remember to take with you the next day.  Make sure your keys are there and anything else you need to remember.  If something can't go in this spot (like the cupcakes you baked for your child's class) then put a post-it note on your keys so that you don't forget to grab them from the refrigerator.

8.  If you haven't already decided what's for dinner tomorrow, take a moment to think about it and take anything out of the freezer and place it in the fridge to defrost.

9.  Make sure that your child's backpack has everything that they will need for the day packed inside.  Do they need gym clothes, a book report, uniforms, etc.?  Make sure they are in there.

Now for the actual morning part of streamlining your morning routine.

1. Set your alarm for 30 minutes earlier to get some time to yourself.  You could use this time to run a load of laundry, exercise or, my favourite, sit quietly with a cup of coffee.

2. Get ready first so that you'll be better able to handle whatever else comes up.

3. Write down a morning routine for each family member.  Use pictures for children that are too young to read.  It will save on nagging because the kids will know exactly what they should do.

4. Don't fight with your kids' personalities.  If it takes 30 minutes to get your teenager out of bed, then start rousing him 30 minutes earlier.  If your 12 year old daughter needs to change her outfit just before leaving each morning, then announce that you will be leaving 15 minutes earlier each morning (make up some believable excuse).  When she runs and changes you will still be on time.

5. Consider fast foods for breakfast.  Not fast food, as in the golden arches, but things like smoothies, fruit and a muffin, cereal and milk.

6. Give yourself a treat.   There's no point in doing all of this preparation if you don't use the extra time in the morning for a little snuggle time or perhaps you could even go so far as a family breakfast all together at the table just like in A Christmas Story.  If you can manage that, you are my hero!


Wednesday, August 22, 2012

Lunch Time


It's that time of year when the kids all head back to school and it's time to start thinking about lunches.  Even if you don't have school-aged children you still have to eat lunch yourself and, if you are like me, it can be hard to come up with some interesting and healthy ideas that are not just boring sandwiches.

I am not a big fan of sandwiches.  I remember going to school as a child and my mom would pack me a sandwich.  Quite often is was Mac N Cheese Loaf, this awful, congealed meat substance that had bits of macaroni and cheese scattered throughout.  Luckily for me my grandmother lived directly across the road from my school.  I would go there everyday at lunch time and she would have a TV tray set up in front of a television tuned to the Flintstones.  If I happened to get the dreaded Mac N Cheese loaf she would make up a nice Nutella sandwich for me.  I loved my grandma!  I fed my other sandwich to the dog.  I don't know if my mother ever found out.......well, she has now once she reads this blog!

When my boys were in school their favourite lunch on a cold, Canadian winter's day was hot dogs.  Hot dogs were extremely easy to make for them, so that was a bonus.  I put two wieners into a wide-mouthed thermos and covered them with hot water from the kettle.  I let them sit for a minute to heat up while I packed the buns (with the ketchup already on it), snacks and drinks.  After a minute I drained off the water and added more.  This kept them hot until lunch time.  I tried to give them something hot quite often in the winter because I knew that they had a 45 minute recess right after lunch.  They went to a small school in the country and the playground was surrounded by farm fields.  There was no windbreak so it could get pretty cold playing out there.

Personally, I struggle with lunch ideas.  It's not that I don't like lunch.  I mostly work from home and I find that I tend to work through lunch until I am starving mid-afternoon.  At 3:00pm I don't want to make myself a huge lunch because it will just spoil my dinner.  More often than not I would simply grab a snack and, because I was so hungry, it usually was not healthy.

Recently I found this website Iowa Girl Eats.  She has a recipe for a Green Monster Smoothie that I am obsessed with right now.  This is my lunch most days and I have to say that it is delicious.  It's quick and easy and, with an immersion blender, it is a breeze to clean up.  Don't let all the spinach in the recipe scare you; you can barely taste it.


For other lunch ideas check out this website Easy Lunch Boxes.   They have hundreds of ideas for a healthy lunch that will keep you and your family from getting bored.

After you've had a look at Easy Lunch Boxes, check out this extremely talented mom at Lunchbox Awesome.  This mom has directed her artistic flare to her son's lunchbox.  She is much more talented and has way more time on her hands than I. 


How awesome would it be to be her son!  Wondering just what your lunch is going to look like each day.

What are some of your favourite lunch ideas?  I could really use some help!


Monday, August 20, 2012

When Does Your "New Year" Begin?


For many people with school-aged children this is the "New Year" for them.  It's filled with promises to never be late in the morning, sign all notes the night they come home, make wonderful, healthy lunches that the kids won't get bored with, be more involved in school and get more organized.

Getting more organized this time of year is different than the "get more organized" resolution made on the first of January.  In January it means that we will clean out the closets and pantry and generally purge our lives of excess "stuff" after a season of gluttony and too much.  Back to school "getting organized" usually involves things that have to do with time management - getting more done in less time.

After a summer of vacation fun and relaxed routines it's time to get back on schedule.  And it is usually a very full schedule at that.  Committee meetings that were suspended for the summer have begun again, after school activities begin in earnest and things tend to get busier at work as everyone is now finished with their summer holidays.  Suddenly the calendar begins to fill up and, if you are like me, you wonder how you are going to fit it all in.  Being more organized becomes much more important.

Where I live the kids all go back to school on the first Tuesday of September (Monday being a holiday).  On that morning, around 9:00am, a friend and I have had a standing appointment for the past 12 years.  We sit on my front porch with our coffees and we listen for the collective sigh of parents relishing that first morning of peace and quiet.  Although I missed my children being home, for that one brief moment, I think I sighed the loudest.  I know that it is the calm before the storm.

Do you make resolutions this time of year?

Friday, August 17, 2012

Peach Salsa Recipe


This is a peach salsa recipe that I got from my Bernardin cookbook.  Bernardin makes canning jars and they have an excellent book called The Guide to Home Preserving.  My book was copyrighted in 1995 so it is a little older but the Bernardin website also has some great recipes.

Peach Salsa

6 cups of peaches, peeled and chopped
1 1/4 cups of chopped red onion
4 jalapeno peppers, finely chopped
1 red pepper, chopped
1/2 cup loosely packed, finely chopped cilantro or coriander
1/2 cup white vinegar
2 tbsp. liquid honey
1 clove garlic, finely chopped
1 1/2 tsp. ground cumin
1/2 tsp cayenne pepper

Combine all ingredients in a large pot and bring to a boil, stirring constantly to prevent scorching.  Boil gently, stirring frequently, 5 minutes.  Pour salsa into clean, prepared canning jars leaving 1/2 inch head space.  Place lids on jars and place in a boiling water bath for 15 minutes.  Remove jars and cool on the counter.  Check to make sure that the jars have sealed.  Any that didn't should go directly into the fridge and used within 3 weeks.

Use your food processor, if you have one, to chop the onion, red pepper, jalapenos and garlic.  It made making this recipe so much easier than if I had to chop all the vegetables by hand.

Do you have a favourite home preserve? 


Thursday, August 16, 2012

Fruited Chili Sauce Recipe


A few days ago I shared with you my canning cupboard.  The recipe that I am going to share with you today I would not dream of doing without.  It is my grandmother's Chili Sauce recipe.  My grandmother was a wonderful cook and her chili sauce was amazing.  Shortly after Mr. P and I married, I went to my mother and got the recipe for Grandma's Chili Sauce.  For years I tried making the chili sauce just like Grandma used to but it was always so watery when I was done.  I tried boiling it longer but then I just burned it.  I tried using plum tomatoes but nothing seemed to work.  It turns out that I was supposed to spoon off the excess liquid.  Somehow I missed copying down that vital piece of information! 

I was relating this tale to my 97 year old next-door neighbor when she informed me that I shouldn't drain off all of that liquid goodness.  She said to add peaches, pears and apples to "soak it all up".  I gave it a try and I have to say that I wouldn't make it any other way now.

This fruited version of Chili Sauce is very versatile.  Not only do we use it as a condiment but I use it in a lot of other ways too.  I love dipping a grilled cheese sandwich into it instead of ketchup.  On a busy fall or winter day I will grab a jar of chili sauce, a can of baked beans and some sliced up sausage and put it all in a slow cooker on low.  Dinner is ready when we get home and the house smells wonderful.  I also use it over pork chops cooked in the slow cooker.

Okay, enough talk.  Here is a slightly tweaked version of my grandmother's chili sauce.


Fruited Chili Sauce

10 large tomatoes, peeled and chopped
3 large onions, chopped
1 cup chopped celery
1 sweet red pepper, chopped
1 small hot red pepper, finely chopped
3 tbsp. salt
2 tsp. cinnamon
2 tsp. ground ginger
1/2 tsp. ground cloves
1 1/2 cups cider vinegar
3 large apples, peeled and chopped
3 large peaches, peeled and chopped
3 large pears, peeled and chopped
1 cup of brown sugar

Boil everything except the brown sugar for one hour, stirring occasionally.  Once the sauce is fully cooked take it off the heat and add the brown sugar.  Mix thoroughly and pour sauce into clean canning jars leaving 1/2 head space at the top.  Place lids on the jars and put jars into a boiling water bath for 15 minutes.  Remove jars and cool on the counter.  Check jars to ensure that they sealed and place any unsealed jars in the fridge to use within the next 3 weeks.


Wednesday, August 15, 2012

Jello Jam


I got the following recipe for jam from Mr. P's Oma.  Since it uses Jello I'm pretty sure it was not a recipe that had been handed down from generation to generation.  She probably got it out of a magazine or perhaps even off of the Jello package itself.  Although Oma only used the recipe to make Rhubarb jam you can use any flavour combination you like.


Jello Jam

5 cups of fruit finely chopped
5 cups of sugar (I used half sugar and half Splenda since Mr. P is diabetic)
1  19oz can of crushed pineapple, juice included
2 packages of Jello (3oz)

Mix the fruit, sugar and pineapple and bring to a boil.  Boil gently for 20 minutes.  Remove from heat and stir in Jello.  Stir for at least a minute to ensure that the Jello is dissolved.  Pour into clean jars leaving 1/2 inch head space.  Place lids on jars and put them in a boiling water bath for 15 minutes.  Remove from bath and cool on the counter.  Check jars to make sure that they are sealed.  Any not sealed should be put in the fridge and used within the next 3 weeks.  This jam can also be frozen instead of canned.
Have fun with this recipe.  This year I used peaches with Peach Jello and a mixture of strawberries and rhubarb with Strawberry Jello.


You could try cherries with Cherry Jello, blueberries with Lemon Jello, plums with Orange Jello.  You are only limited by your imagination and how many flavours of Jello your country carries.  In Canada we don't have quite the selection that our American counterparts have.

What other flavour combinations can you come up with?


Tuesday, August 14, 2012

A Peck Of Pickle Recipes


Yesterday I showed you this photo of my canning cupboard.  This is what I canned, from left to right, top to bottom:

Maple Syrup, Fruited Chili Sauce, Corn, Dill Pickles, Strawberry Rhubarb Jam, Peach Jam, Baby Dill Pickles, Peach Salsa, Pickled Banana Peppers and Society Pickles.

When I was young most Sunday evenings were spent at my grandparent's house for dinner.  Grandma always made so much that, no matter how many people dropped by, there was always plenty to eat.  We kids would help set the table which always included a tray of her homemade pickles.  There was usually only half a tray left by the time dinner was actually served as kids and adults alike were scolded by Grandma to get out of the pickle tray.  She always did it with a smile.  Looking back I'm pretty sure the pickle tray went on the table early to keep us from being under foot in her tiny kitchen. 

The first recipe that I'm sharing is for Grandma's Society Pickles.  These are 8 day pickles that make your home smell amazing when boiling the syrup on the last few days.  The smell reminds me of my beloved Grandmother.


Society Pickles

1 gallon of dill sized cucumbers (cut off the ends and scrub) - 1 gallon = about 5 pounds

Pour cucumbers into a pot of freshly boiled water each day for 4 days.  Drain off old water and use new water each day.  On the 5th day drain off all the water and cut the cucumbers into chunks.

Syrup

4 cups of cider vinegar
8 cups of sugar
1/2 cup of pickling spice wrapped in cheese cloth or some other clean material
2 tablespoons of pickling salt (do not use table salt during canning as it will make the pickles cloudy)
1 teaspoon of green food colouring

Bring syrup to a boil and pour over the cucumbers each day for 3 days.  I used a small sieve to scoop the cucumbers each day out of the pot.  I then brought the syrup to a boil.  Once the syrup was boiling I turned off the heat and poured the cucumbers back in.  On the 4th day take the cucumbers out of the syrup and put them into clean canning jars.  Bring the syrup to a boil and pour over the cucumbers leaving 1/2" head space at the top.  Discard the bag of pickling spice.  Place jars in a boiling water bath and process for 15 minutes.  Take jars out and let them cool on the counter.  Check the lids to make sure that they sealed.  Any not sealed can be boiled again or put into the fridge until you are ready to use them.


Dill Pickles

 
1 quart of dill sized cucumbers (the ones pictured above are smaller for baby dills but you can use whatever size you like for your pickles)
5 or 6 cloves of garlic
Fresh dill heads

2 cups of vinegar
6 cups of water
1/2 cup pickling salt (do not use table salt as it will result in cloudy pickles)

Scrub cucumbers and cut off both ends (it is important to cut off the bud end as it contains an enzyme that will make your pickles mushy - I tend to cut off both ends just to be safe).  Place one clove of garlic and a dill head in the bottom of clean canning jars.  If the dill is larger you can use half a head.  Pack in the cucumbers, not too tight.  Add another clove of garlic to the top of the jar and more dill if needed (the large jars of dills on the top shelf have 2 cloves of garlic in the bottom and 2 on top along with dill on both the top and the bottom - the smaller jars of baby dills just have one medium sized head of dill on the bottom only and 1 clove of garlic on to top and bottom of the jars).  Bring the vinegar, water and pickling salt to a boil and boil for 5 minutes. Pour over the cucumbers leaving 1/2 head space in the jars.  Place lids on the jars and put in a boiling water bath for 15 minutes.  Take jars out and cool on the counter.  Check all jars to make sure that they are sealed properly.  Any that did not seal should go into the fridge.  Dill pickles will be ready after 8 weeks of sitting in the brine.


Pickled Banana Peppers

1 quart of banana peppers

4 cups of water
1/2 cup pickling salt (do not use table salt as it will result in cloudy pickles)
3 cups of water
1 tsp. of dried oregano
4 tsp. of dried basil
1 1/2 cups vinegar
5-6 cloves of garlic

Wash the banana peppers.  This next part is all depends on your preferences.  If your banana peppers are too large to fit into the jars that you wish to use, then cut them in half and take out the seeds.  I actually cut them into quarters so that they would fit into my jars.  If the peppers are small you can leave them whole and just poke them once with a fork so that the liquid penetrates the pepper.  Be advised though that leaving in the seeds will make the peppers hotter than if you take them out.  Combine the 4 cups of water and the 1/2 cup pickling salt and heat in a pot on the stove just until the salt dissolves.  Let cool and pour over your prepared peppers.  Allow them to sit overnight.

The next day drain off the peppers and rinse well.  Pack peppers into clean jars along with one clove of garlic.  In a pot on the stove combine the 3 cups of water, oregano, basil and vinegar and bring to a boil.  Boil for 5 minutes and pour over peppers in the jar leaving 1/2 inch head space.  Place lids on jars and place them in a boiling water bath for 15 minutes.  Take jars out and cool on the counter.   Check all jars to make sure that they are sealed properly. Any that did not seal should go into the fridge.  Peppers should be ready to eat in 6 - 8 weeks.  They taste very similar to the ones that the Olive Garden uses in their house salad.


Monday, August 13, 2012

My Canning Cupboard


Sometimes I miss the old days when Mom would head down to the root cellar to bring up a colourful jar of something delicious that had been grown in her garden and lovingly preserved for the long winter months.  I can remember her standing over a hot stove in the middle of the summer heat (with no air conditioning) boiling jars of pickles or some homemade strawberry jam.  I can also remember dipping what seemed like 100 turnips in parafin wax to preserve them.  I loved how the wax would mold to my finger as it cooled.  I also remember how much I hated turnip.  I seriously could not understand why on earth she would want to preserve them!

We had a huge garden for a few years along with apple, cherry, peach and plum trees and a few grape vines.  I was in my glory with all this wonderful food ripe for the picking.  My mother has a green thumb that, unfortunately, was not passed down to her daughter.  Instead of a beautiful garden, I have a farmers market two blocks up the street.  It works for me. 

I tried growing a vegetable garden once.  I remember being pregnant with my youngest and going to the garden centre to pick up some seedlings.  Mr. P loved the pickled peppers that you get with your salad at Olive Garden and I had a recipe that would yield similar results.  I picked up a tiny pepper plant and thought to myself that it would not be nearly enough.  So I bought two flats.  That would be 24 hot banana pepper plants for those who don't know.  By the time I gave birth in August we had more peppers than we knew what to do with.  I decided that, if I cut the peppers in half, took out the seeds and cramed as many as I could into each jar, then I might be able to use up half of them.  So Mr. P and I started chopping and seeding the hot banana peppers.  It took us most of the afternoon.  It wasn't until Mr. P needed to use the bathroom that we realized that perhaps we should have been wearing gloves!  The capsaisin on our hands was so potent that, for the next few days, we both had to wear gloves when handling our newborn!

Just a few short months ago my canning cupboard looked like this.


There are two more cupboards like this along one wall in my laundry room. A couple of months ago I decided that it was time to organize the laundry room and the canning cupboard was part of that project.


This is another view.  I removed all of the bbq items and gave them their own trunk elsewhere in the room.  I removed all of the books.  Some were donated and others were packed off to another closet.  This was going to be strictly a canning cupboard.

This is what it looked like after.


Lots of empty jars just waiting to be filled up.  It took a lot of work but I did eventually manage to fill most of them.


There are a few empty jars left but I think I am done my canning for this season.


I had four strawberry picking baskets so I used two of them to store snap lids and screw tops.  I put the standard size ones in one basket and the wide mouth ones in the other.  No more hunting for the proper lids and I can see right away if I need to buy more.

Having a full freezer and canning cupboard satisfies some sort of primal instinct in me.  Probably because our ancestors were hunter/gatherers, and if history has taught me anything, it's that I can gather like nobody's business!  Probably why I need to declutter so often.

This is my dream root cellar.  Isn't it beautiful?!


Over the next few days I will share with you some of the recipes for what I have canned.  A couple come from my grandmother and I have a great recipe for jam that uses Jello.

Do you preserve food for the winter?


Friday, August 10, 2012

15 Ways To Stay More Organized In The Bathroom


Your bathroom may not be the biggest room in your home but it certainly is one of the more important ones.  In addition to bathing and grooming, sometimes the bathroom is the only room in the house that you can go to for some peace and quiet. 

I've come up with 15 ways to get your bathroom more organized that don't require expensive renovations.  These are simple, in-expensive ideas that will help you make your bathroom feel more like a spa rather than the blender swirl of blow dryers, wet towels, mascara wands and roll-on deodorant that they are.

1. Place a loose elastic or ribbon around each of 4 rolls of toilet paper and place them behind all the other rolls in your bathroom.  You'll be reminded to buy more when you come to one with some extra embellishment (because we all know you, like me, are the only one that actually changes the roll in your home).

2. Place a clock in each bathroom.  This will help keep everyone on time when getting ready in the morning.

3. Put extra trash bags at the bottom of the waste basket to save you a trip to the cupboard to retrieve more when changing the trash.

4. Toss any old makeup, sunscreen or any other lotions that are just taking up room in your cupboards.

5. Stock your medicine kit with cold and flu remedies to save you a trip to the pharmacy when you are feeling sick.

6. Store hair elastics on a shower curtain ring or a carabiner.


8. Place a tall, narrow basket next to the toilet for magazines.

9. Attach a wire basket to the side of your vanity to hold your hair tools.


10. Use a hanging fruit basket on the shower curtain rod to store kids bath toys.

11. Place a second shower curtain rod along the wall at the back of the shower to hang shower poufs, back scrubbers and kids bath toys.

12. Use a wall-mounted wine rack to store rolled up towels to give you more room in the linen closet.


13. Cut down a plastic, over-the-door shoe organizer and hang it on the inside of the vanity door to hold makeup and other lotions.

14. Place a decorative shelf above the bathroom door for more storage.


15. Use decorative shelving brackets as dividers in the linen closet to keep towels in their place.

What do you do to keep your bathroom more organized?

Wednesday, August 8, 2012

Organizing The Fridge


If you are like me, the summer can mean a fridge crammed full with food and drinks for the family.  The summer time means cold drinks, salads and fresh, in-season fruits and vegetables that all take up a lot of room in the family refrigerator.  This year I decided to treat the space inside my fridge like I would the inside of a closet.  Both the fridge and a closet are designed for storage and it was time to make my fridge more efficient.

The above picture is of my fridge.  I have a side-by-side refrigerator and freezer so this means that the fridge is narrow but tall. 


This is the top shelf.  Up here I keep things like syrups, jams, yogurts and drinks.  I found that a lot of these jars were small and I wasn't utilizing the vertical space.  I placed a simple metal rack on the shelf near the back giving me more space to stack these items.  It also makes it easier to see what's in back when there are things placed in front.


This shelf contains all of the tall items; the milk, coffee creamer and a pitcher of iced tea.  I added another small metal rack to the back corner.  I found that Ziplock bags containing partial packages of cheese would get tossed anywhere in the fridge and I would inevitably find moulding cheese, tucked behind the mayonnaise, that we missed using up.  The cheese now has it's own shelf and it is easily seen by everyone in the household.


Do you have one of those shelves in the fridge where things get shoved to the back never to be seen again?  For me it was this shelf.  It was hard to see in the back, even with the glass shelves.  Every now and then I would dig back in there and treat myself to a rousing game of Name That Food!  Somehow, even when I won, I felt like I lost.  I solved the problem by installing a lazy susan.  I keep things like pickles, olives, salsa and even some Cheese Whiz on here.  When I need to find something I just have to spin the lazy susan.


There is even enough room in front of the lazy susan to keep a couple of small containers like the one full of olives that is there now.  If you have trouble bending over to see just what is on that lower shelf, like many of my elderly clients do, try placing clear plastic bins there.  They easily pull out so that you can see what's inside and the plastic bins contain any spills making cleanup easier.


The last shelf holds the flats of eggs and bags of milk.  We buy our eggs directly from the farmer.  The flats take up a lot of space but I prefer fresh farm eggs over store-bought and I believe it's worth the extra space it takes up in the fridge.  I could store the eggs in regular, cartons from the store and will do that if I find the need for more space.  I picked up the plastic, milk storage unit at a local container store called Solutions.  In Canada, our milk comes in bags that we place in plastic pitchers.  Three bags equals four litres of milk.  This one is nice because you take the bag from the bottom of the container and fill it from the top so that you always use up the oldest milk first.


The door of my fridge holds all the condiments, salad dressings and sauces.  The salad dressings have their own shelf.  BBQ sauce and some other sauces and oils that are not used regularly are kept on the bottom shelf.  I have one shelf designated for tall items like cooking wines and ketchup, etc.

There isn't much fresh in the fridge at the moment because these photos were taken just before a trip to the grocery store.  When I do have more fresh ingredients I tend to cut them up to make more room.  For instance, when I buy celery, my kids would not think of cutting some up to eat as a snack.  But if I have it cut up and in a bag, it's gone.  Same with cantaloupes or watermelon.  For some reason the extra step of slicing off some fruit for yourself is lost on my teenagers, but if Mom has it all cubed and in a bowl it doesn't last more than a couple of days. 

My friend Linda sent me this photo. 


She writes, "This is how I keep my pop in the fridge. When they are loose, on wire shelves, they fall over and slide around. In a basket, they are all together, easy to slide out, choose, and slide back. Basket allows air flow too.

I have another basket full of condiments and small jars that usually migrate to the back of the fridge, grow green, and finally make themselves known by issuing declarations regarding their independence from captivity."


I love how Linda keeps things contained and controlled.  Haven't we all opened a jar from the back of the fridge only to discover that the contents have sprouted a five o'clock shadow? 
Do you have any tips or tricks for keeping your refrigerator organized?